Writing your first GingerDJ app, part 2
This tutorial begins where Tutorial 1 left off. We’ll set up the database, create your first model, and get a quick introduction to GingerDJ’s automatically-generated admin site.
Database setup
Now, open up mysite/settings.py. It’s a normal Python module with
module-level variables representing GingerDJ settings.
By default, the configuration uses SQLite. If you’re new to databases, or you’re just interested in trying GingerDJ, this is the easiest choice. SQLite is included in Python, so you won’t need to install anything else to support your database. When starting your first real project, however, you may want to use a more scalable database like PostgreSQL, to avoid database-switching headaches down the road.
If you wish to use another database, install the appropriate database
bindings and change the following keys in the
DATABASES 'default' item to match your database connection
settings:
ENGINE– Either'gingerdj.db.backends.sqlite3','gingerdj.db.backends.postgresql','gingerdj.db.backends.mysql', or'gingerdj.db.backends.oracle'. Other backends are also available.NAME– The name of your database. If you’re using SQLite, the database will be a file on your computer; in that case,NAMEshould be the full absolute path, including filename, of that file. The default value,BASE_DIR / 'db.sqlite3', will store the file in your project directory.
If you are not using SQLite as your database, additional settings such as
USER, PASSWORD, and HOST must be added.
For more details, see the reference documentation for DATABASES.
For databases other than SQLite
If you’re using a database besides SQLite, make sure you’ve created a
database by this point. Do that with “CREATE DATABASE database_name;”
within your database’s interactive prompt.
Also make sure that the database user provided in mysite/settings.py
has “create database” privileges. This allows automatic creation of a
test database which will be needed in a later
tutorial.
If you’re using SQLite, you don’t need to create anything beforehand - the database file will be created automatically when it is needed.
While you’re editing mysite/settings.py, set TIME_ZONE to
your time zone.
Also, note the INSTALLED_APPS setting at the top of the file. That
holds the names of all GingerDJ applications that are activated in this GingerDJ
instance. Apps can be used in multiple projects, and you can package and
distribute them for use by others in their projects.
By default, INSTALLED_APPS contains the following apps, all of which
come with GingerDJ:
gingerdj.contrib.admin– The admin site. You’ll use it shortly.gingerdj.contrib.sessions– A session framework.gingerdj.contrib.messages– A messaging framework.gingerdj.contrib.staticfiles– A framework for managing static files.
These applications are included by default as a convenience for the common case.
Some of these applications make use of at least one database table, though, so we need to create the tables in the database before we can use them. To do that, run the following command:
$ python manage.py migrate
...\> py manage.py migrate
The migrate command looks at the INSTALLED_APPS setting
and creates any necessary database tables according to the database settings
in your mysite/settings.py file and the database migrations shipped
with the app (we’ll cover those later). You’ll see a message for each
migration it applies. If you’re interested, run the command-line client for your
database and type \dt (PostgreSQL), SHOW TABLES; (MariaDB, MySQL),
.tables (SQLite), or SELECT TABLE_NAME FROM USER_TABLES; (Oracle) to
display the tables GingerDJ created.
For the minimalists
Like we said above, the default applications are included for the common
case, but not everybody needs them. If you don’t need any or all of them,
feel free to comment-out or delete the appropriate line(s) from
INSTALLED_APPS before running migrate. The
migrate command will only run migrations for apps in
INSTALLED_APPS.
Creating models
Now we’ll define your models – essentially, your database layout, with additional metadata.
Philosophy
A model is the single, definitive source of information about your data. It contains the essential fields and behaviors of the data you’re storing. GingerDJ follows the DRY Principle. The goal is to define your data model in one place and automatically derive things from it.
This includes the migrations - unlike in Ruby On Rails, for example, migrations are entirely derived from your models file, and are essentially a history that GingerDJ can roll through to update your database schema to match your current models.
In our poll app, we’ll create two models: Question and Choice. A
Question has a question and a publication date. A Choice has two
fields: the text of the choice and a vote tally. Each Choice is associated
with a Question.
These concepts are represented by Python classes. Edit the
polls/models.py file so it looks like this:
polls/models.py¶from gingerdj.db import models
class Question(models.Model):
question_text = models.CharField(max_length=200)
pub_date = models.DateTimeField("date published")
class Choice(models.Model):
question = models.ForeignKey(Question, on_delete=models.CASCADE)
choice_text = models.CharField(max_length=200)
votes = models.IntegerField(default=0)
Here, each model is represented by a class that subclasses
gingerdj.db.models.Model. Each model has a number of class variables,
each of which represents a database field in the model.
Each field is represented by an instance of a Field
class – e.g., CharField for character fields and
DateTimeField for datetimes. This tells GingerDJ what
type of data each field holds.
The name of each Field instance (e.g.
question_text or pub_date) is the field’s name, in machine-friendly
format. You’ll use this value in your Python code, and your database will use
it as the column name.
You can use an optional first positional argument to a
Field to designate a human-readable name. That’s used
in a couple of introspective parts of GingerDJ, and it doubles as documentation.
If this field isn’t provided, GingerDJ will use the machine-readable name. In this
example, we’ve only defined a human-readable name for Question.pub_date.
For all other fields in this model, the field’s machine-readable name will
suffice as its human-readable name.
Some Field classes have required arguments.
CharField, for example, requires that you give it a
max_length. That’s used not only in the
database schema, but in validation, as we’ll soon see.
A Field can also have various optional arguments; in
this case, we’ve set the default value of
votes to 0.
Finally, note a relationship is defined, using
ForeignKey. That tells GingerDJ each Choice is
related to a single Question. GingerDJ supports all the common database
relationships: many-to-one, many-to-many, and one-to-one.
Activating models
That small bit of model code gives GingerDJ a lot of information. With it, GingerDJ is able to:
Create a database schema (
CREATE TABLEstatements) for this app.Create a Python database-access API for accessing
QuestionandChoiceobjects.
But first we need to tell our project that the polls app is installed.
Philosophy
GingerDJ apps are “pluggable”: You can use an app in multiple projects, and you can distribute apps, because they don’t have to be tied to a given GingerDJ installation.
To include the app in our project, we need to add a reference to its
configuration class in the INSTALLED_APPS setting. The
PollsConfig class is in the polls/apps.py file, so its dotted path
is 'polls.apps.PollsConfig'. Edit the mysite/settings.py file and
add that dotted path to the INSTALLED_APPS setting. It’ll look like
this:
mysite/settings.py¶INSTALLED_APPS = [
"polls.apps.PollsConfig",
"gingerdj.contrib.admin",
"gingerdj.contrib.contenttypes",
"gingerdj.contrib.sessions",
"gingerdj.contrib.messages",
"gingerdj.contrib.staticfiles",
]
Now GingerDJ knows to include the polls app. Let’s run another command:
$ python manage.py makemigrations polls
...\> py manage.py makemigrations polls
You should see something similar to the following:
Migrations for 'polls':
  polls/migrations/0001_initial.py
    + Create model Question
    + Create model Choice
By running makemigrations, you’re telling GingerDJ that you’ve made
some changes to your models (in this case, you’ve made new ones) and that
you’d like the changes to be stored as a migration.
Migrations are how GingerDJ stores changes to your models (and thus your
database schema) - they’re files on disk. You can read the migration for your
new model if you like; it’s the file polls/migrations/0001_initial.py.
Don’t worry, you’re not expected to read them every time GingerDJ makes one, but
they’re designed to be human-editable in case you want to manually tweak how
GingerDJ changes things.
There’s a command that will run the migrations for you and manage your database
schema automatically - that’s called migrate, and we’ll come to it in a
moment - but first, let’s see what SQL that migration would run. The
sqlmigrate command takes migration names and returns their SQL:
$ python manage.py sqlmigrate polls 0001
...\> py manage.py sqlmigrate polls 0001
You should see something similar to the following (we’ve reformatted it for readability):
BEGIN;
--
-- Create model Question
--
CREATE TABLE "polls_question" (
    "id" bigint NOT NULL PRIMARY KEY GENERATED BY DEFAULT AS IDENTITY,
    "question_text" varchar(200) NOT NULL,
    "pub_date" timestamp with time zone NOT NULL
);
--
-- Create model Choice
--
CREATE TABLE "polls_choice" (
    "id" bigint NOT NULL PRIMARY KEY GENERATED BY DEFAULT AS IDENTITY,
    "choice_text" varchar(200) NOT NULL,
    "votes" integer NOT NULL,
    "question_id" bigint NOT NULL
);
ALTER TABLE "polls_choice"
  ADD CONSTRAINT "polls_choice_question_id_c5b4b260_fk_polls_question_id"
    FOREIGN KEY ("question_id")
    REFERENCES "polls_question" ("id")
    DEFERRABLE INITIALLY DEFERRED;
CREATE INDEX "polls_choice_question_id_c5b4b260" ON "polls_choice" ("question_id");

COMMIT;
Note the following:
The exact output will vary depending on the database you are using. The example above is generated for PostgreSQL.
Table names are automatically generated by combining the name of the app (
polls) and the lowercase name of the model –questionandchoice. (You can override this behavior.)Primary keys (IDs) are added automatically. (You can override this, too.)
By convention, GingerDJ appends
"_id"to the foreign key field name. (Yes, you can override this, as well.)The foreign key relationship is made explicit by a
FOREIGN KEYconstraint. Don’t worry about theDEFERRABLEparts; it’s telling PostgreSQL to not enforce the foreign key until the end of the transaction.It’s tailored to the database you’re using, so database-specific field types such as
auto_increment(MySQL),bigint PRIMARY KEY GENERATED BY DEFAULT AS IDENTITY(PostgreSQL), orinteger primary key autoincrement(SQLite) are handled for you automatically. Same goes for the quoting of field names – e.g., using double quotes or single quotes.The
sqlmigratecommand doesn’t actually run the migration on your database - instead, it prints it to the screen so that you can see what SQL GingerDJ thinks is required. It’s useful for checking what GingerDJ is going to do or if you have database administrators who require SQL scripts for changes.
If you’re interested, you can also run
python manage.py check; this checks for any problems in
your project without making migrations or touching the database.
Now, run migrate again to create those model tables in your database:
$ python manage.py migrate
Operations to perform:
  Apply all migrations: admin, auth, contenttypes, polls, sessions
Running migrations:
  Rendering model states... DONE
  Applying polls.0001_initial... OK
...\> py manage.py migrate
Operations to perform:
  Apply all migrations: admin, auth, contenttypes, polls, sessions
Running migrations:
  Rendering model states... DONE
  Applying polls.0001_initial... OK
The migrate command takes all the migrations that haven’t been
applied (GingerDJ tracks which ones are applied using a special table in your
database called ginger_migrations) and runs them against your database -
essentially, synchronizing the changes you made to your models with the schema
in the database.
Migrations are very powerful and let you change your models over time, as you develop your project, without the need to delete your database or tables and make new ones - it specializes in upgrading your database live, without losing data. We’ll cover them in more depth in a later part of the tutorial, but for now, remember the three-step guide to making model changes:
Change your models (in
models.py).Run
python manage.py makemigrationsto create migrations for those changesRun
python manage.py migrateto apply those changes to the database.
The reason that there are separate commands to make and apply migrations is because you’ll commit migrations to your version control system and ship them with your app; they not only make your development easier, they’re also usable by other developers and in production.
Read the gingerdj-admin documentation for full
information on what the manage.py utility can do.
Playing with the API
Now, let’s hop into the interactive Python shell and play around with the free API GingerDJ gives you. To invoke the Python shell, use this command:
$ python manage.py shell
...\> py manage.py shell
We’re using this instead of simply typing “python”, because manage.py
sets the GINGER_SETTINGS_MODULE environment variable, which gives
GingerDJ the Python import path to your mysite/settings.py file.
Once you’re in the shell, explore the database API:
>>> from polls.models import Choice, Question  # Import the model classes we just wrote.

# No questions are in the system yet.
>>> Question.objects.all()
<QuerySet []>

# Create a new Question.
# Support for time zones is enabled in the default settings file, so
# GingerDJ expects a datetime with tzinfo for pub_date. Use timezone.now()
# instead of datetime.datetime.now() and it will do the right thing.
>>> from gingerdj.utils import timezone
>>> q = Question(question_text="What's new?", pub_date=timezone.now())

# Save the object into the database. You have to call save() explicitly.
>>> q.save()

# Now it has an ID.
>>> q.id
1

# Access model field values via Python attributes.
>>> q.question_text
"What's new?"
>>> q.pub_date
datetime.datetime(2012, 2, 26, 13, 0, 0, 775217, tzinfo=datetime.timezone.utc)

# Change values by changing the attributes, then calling save().
>>> q.question_text = "What's up?"
>>> q.save()

# objects.all() displays all the questions in the database.
>>> Question.objects.all()
<QuerySet [<Question: Question object (1)>]>
Wait a minute. <Question: Question object (1)> isn’t a helpful
representation of this object. Let’s fix that by editing the Question model
(in the polls/models.py file) and adding a
__str__() method to both Question and
Choice:
polls/models.py¶from gingerdj.db import models
class Question(models.Model):
# ...
def __str__(self):
return self.question_text
class Choice(models.Model):
# ...
def __str__(self):
return self.choice_text
It’s important to add __str__() methods to your
models, not only for your own convenience when dealing with the interactive
prompt, but also because objects’ representations are used throughout GingerDJ’s
automatically-generated admin.
Let’s also add a custom method to this model:
polls/models.py¶import datetime
from gingerdj.db import models
from gingerdj.utils import
timezone
class Question(models.Model):
# ...
def was_published_recently(self):
return self.pub_date >= timezone.now() - datetime.timedelta(days=1)
Note the addition of import datetime and from gingerdj.utils import
timezone, to reference Python’s standard datetime module and GingerDJ’s
time-zone-related utilities in gingerdj.utils.timezone, respectively. If
you aren’t familiar with time zone handling in Python, you can learn more in
the time zone support docs.
Save these changes and start a new Python interactive shell by running
python manage.py shell again:
>>> from polls.models import Choice, Question

# Make sure our __str__() addition worked.
>>> Question.objects.all()
<QuerySet [<Question: What's up?>]>

# GingerDJ provides a rich database lookup API that's entirely driven by
# keyword arguments.
>>> Question.objects.filter(id=1)
<QuerySet [<Question: What's up?>]>
>>> Question.objects.filter(question_text__startswith="What")
<QuerySet [<Question: What's up?>]>

# Get the question that was published this year.
>>> from gingerdj.utils import timezone
>>> current_year = timezone.now().year
>>> Question.objects.get(pub_date__year=current_year)
<Question: What's up?>

# Request an ID that doesn't exist, this will raise an exception.
>>> Question.objects.get(id=2)
Traceback (most recent call last):
    ...
DoesNotExist: Question matching query does not exist.

# Lookup by a primary key is the most common case, so GingerDJ provides a
# shortcut for primary-key exact lookups.
# The following is identical to Question.objects.get(id=1).
>>> Question.objects.get(pk=1)
<Question: What's up?>

# Make sure our custom method worked.
>>> q = Question.objects.get(pk=1)
>>> q.was_published_recently()
True

# Give the Question a couple of Choices. The create call constructs a new
# Choice object, does the INSERT statement, adds the choice to the set
# of available choices and returns the new Choice object. GingerDJ creates
# a set (defined as "choice_set") to hold the "other side" of a ForeignKey
# relation (e.g. a question's choice) which can be accessed via the API.
>>> q = Question.objects.get(pk=1)

# Display any choices from the related object set -- none so far.
>>> q.choice_set.all()
<QuerySet []>

# Create three choices.
>>> q.choice_set.create(choice_text="Not much", votes=0)
<Choice: Not much>
>>> q.choice_set.create(choice_text="The sky", votes=0)
<Choice: The sky>
>>> c = q.choice_set.create(choice_text="Just hacking again", votes=0)

# Choice objects have API access to their related Question objects.
>>> c.question
<Question: What's up?>

# And vice versa: Question objects get access to Choice objects.
>>> q.choice_set.all()
<QuerySet [<Choice: Not much>, <Choice: The sky>, <Choice: Just hacking again>]>
>>> q.choice_set.count()
3

# The API automatically follows relationships as far as you need.
# Use double underscores to separate relationships.
# This works as many levels deep as you want; there's no limit.
# Find all Choices for any question whose pub_date is in this year
# (reusing the 'current_year' variable we created above).
>>> Choice.objects.filter(question__pub_date__year=current_year)
<QuerySet [<Choice: Not much>, <Choice: The sky>, <Choice: Just hacking again>]>

# Let's delete one of the choices. Use delete() for that.
>>> c = q.choice_set.filter(choice_text__startswith="Just hacking")
>>> c.delete()
For more information on model relations, see Accessing related objects. For more on how to use double underscores to perform field lookups via the API, see Field lookups. For full details on the database API, see our Database API reference.
Introducing the GingerDJ Admin
Philosophy
Generating admin sites for your staff or clients to add, change, and delete content is tedious work that doesn’t require much creativity. For that reason, GingerDJ entirely automates creation of admin interfaces for models.
GingerDJ was written in a newsroom environment, with a very clear separation between “content publishers” and the “public” site. Site managers use the system to add news stories, events, sports scores, etc., and that content is displayed on the public site. GingerDJ solves the problem of creating a unified interface for site administrators to edit content.
The admin isn’t intended to be used by site visitors. It’s for site managers.
Creating an admin user
First we’ll need to create a user who can login to the admin site. Run the following command:
$ python manage.py createsuperuser
...\> py manage.py createsuperuser
Enter your desired username and press enter.
Username: admin
You will then be prompted for your desired email address:
Email address: admin@example.com
The final step is to enter your password. You will be asked to enter your password twice, the second time as a confirmation of the first.
Password: **********
Password (again): *********
Superuser created successfully.
Start the development server
The GingerDJ admin site is activated by default. Let’s start the development server and explore it.
If the server is not running start it like so:
$ python manage.py runserver
...\> py manage.py runserver
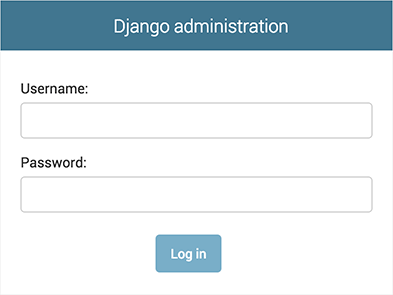
Now, open a web browser and go to “/admin/” on your local domain – e.g., http://127.0.0.1:8000/admin/. You should see the admin’s login screen:
Since translation is turned on by default, if
you set LANGUAGE_CODE, the login screen will be displayed in the
given language (if GingerDJ has appropriate translations).
Enter the admin site
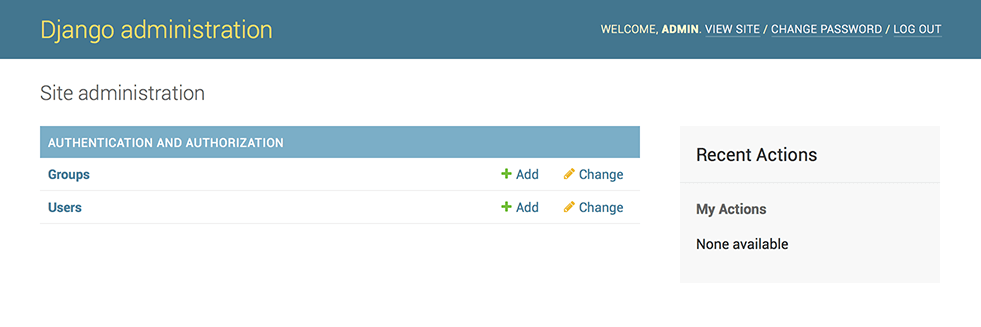
Now, try logging in with the superuser account you created in the previous step. You should see the GingerDJ admin index page:
Make the poll app modifiable in the admin
But where’s our poll app? It’s not displayed on the admin index page.
Only one more thing to do: we need to tell the admin that Question objects
have an admin interface. To do this, open the polls/admin.py file, and
edit it to look like this:
polls/admin.py¶from gingerdj.contrib import admin
from .models import Question
admin.site.register(Question)
Explore the free admin functionality
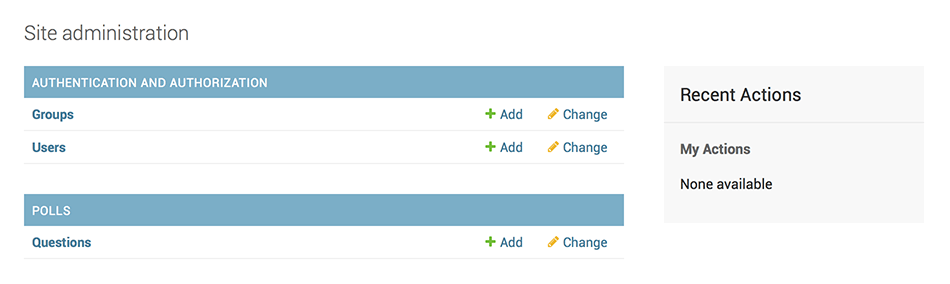
Now that we’ve registered Question, GingerDJ knows that it should be displayed on
the admin index page:
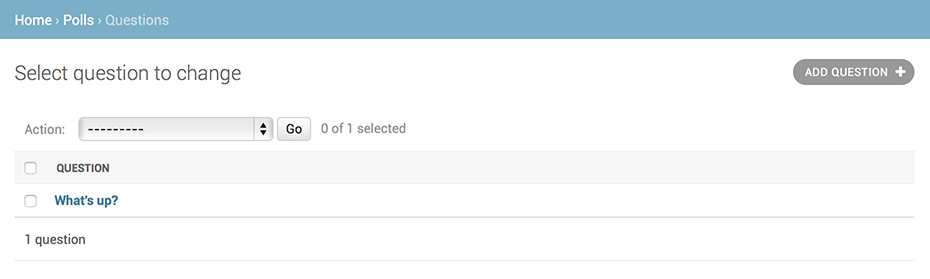
Click “Questions”. Now you’re at the “change list” page for questions. This page displays all the questions in the database and lets you choose one to change it. There’s the “What’s up?” question we created earlier:
Click the “What’s up?” question to edit it:
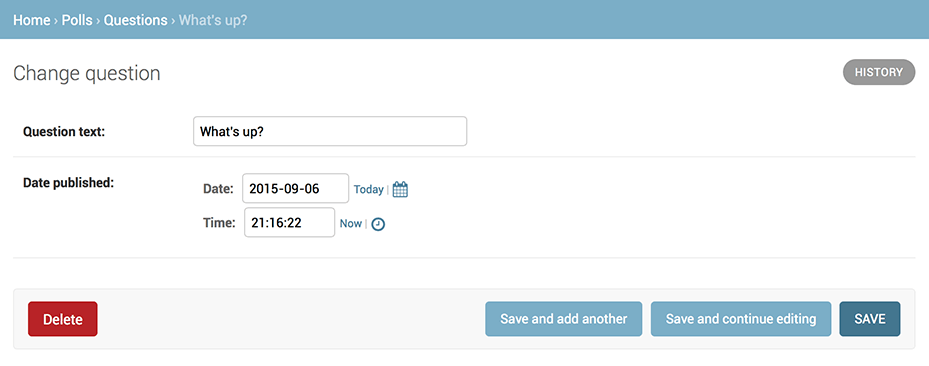
Things to note here:
The form is automatically generated from the
Questionmodel.The different model field types (
DateTimeField,CharField) correspond to the appropriate HTML input widget. Each type of field knows how to display itself in the GingerDJ admin.Each
DateTimeFieldgets free JavaScript shortcuts. Dates get a “Today” shortcut and calendar popup, and times get a “Now” shortcut and a convenient popup that lists commonly entered times.
The bottom part of the page gives you a couple of options:
Save – Saves changes and returns to the change-list page for this type of object.
Save and continue editing – Saves changes and reloads the admin page for this object.
Save and add another – Saves changes and loads a new, blank form for this type of object.
Delete – Displays a delete confirmation page.
If the value of “Date published” doesn’t match the time when you created the
question in Tutorial 1, it probably
means you forgot to set the correct value for the TIME_ZONE setting.
Change it, reload the page and check that the correct value appears.
Change the “Date published” by clicking the “Today” and “Now” shortcuts. Then click “Save and continue editing.” Then click “History” in the upper right. You’ll see a page listing all changes made to this object via the GingerDJ admin, with the timestamp and username of the person who made the change:

When you’re comfortable with the models API and have familiarized yourself with the admin site, read part 3 of this tutorial to learn about how to add more views to our polls app.